Showing posts with label recipes. Show all posts

Monday, December 5, 2011

Happy Monday.. well kind of


How are we feeling this Monday? Is it just me, or is Mondays at this time of year harder to get through? Count your lucky stars if you live in the States, it's still your Sunday night there ;)

My day started with a grocery shop after dropping the kids off. I'm not complaining here, shopping kid-free is a huge luxury for me.

Being this close to Christmas, I am winding down on the sculpting side of things, though the creating is still there, just in other areas. Today I will be starting a memorial sculpt for a special angel baby, and I am hoping to sew up some things as extra gifts as well. I'll share pics and tutorials once they are done, but for now, I can't risk those people peeking here ;)

On the baking side, I think I baked more in this past week than I have in the last six months. My cupboard is full of baking goodies and I have found so many recipes on pinterest.com that I still want to tackle. Seriously, go check that site out if you haven't yet, it is ADDICTIVE, I tell you.

I'll leave you with some pics of the girls getting into the baking mood last night. We made White Chocolate Ginger cookies, and they are to die for. Especially while still warm from the oven. You can find the recipe here.

 I love kids in the kitchen....


I hope you all have a great start to the week.

Thursday, December 1, 2011

Quick and Easy Icecream in a Bag

Happy first of December! It's official, it really feels like Christmas now. I hit the shops this morning, and the Christmas songs were in full swing; last week I felt nothing with them, today I actually felt festive. I have to say though, I feel a bit like Cindy Lou from the Grinch.... there's gotta be more to Christmas. One thing I really don't like is the craziness at this time of year. People lose the plot.
I was in queue last week, and the lady in front of me had a baby bottle that wasn't scanning. The shop assistant needed to call someone out, and I heard the lady behind me mutter a mouthful of expletives. I turned to see a very classily dressed woman. I guess it gets to the best of us :)

Anyway, on a cheerier note, I found the most awesome activity that you can do with the kids these holidays, or even just for yourself if you need a quick icecream fix. It's icecream in a bag and it it so quick and easy. I can guarantee that you'll be sitting down to eat it within 20 minutes of pulling out your ingredients.

So if the festive season is making you sour, (I'm looking at YOU, classy, expletive-spewing lady ;)  put some of this sweet goodness in your gob!
It is the best tasting icecream, and while normally shop icecream makes me feel ill, this was really easy on my tum. If you're like me and are not into dairy, you can apparently do the same thing with coconut cream. (recipe originally found here)

Here's what you need;

1 cup thick or light cream
1 tspn vanilla essence
2 tbspn sugar (we used fine, organic raw)
1/2 cup coarse salt, or rock salt
Ice
1 sandwich ziplock bag
1 large ziplock bag

Optional; Food colouring, flavours.

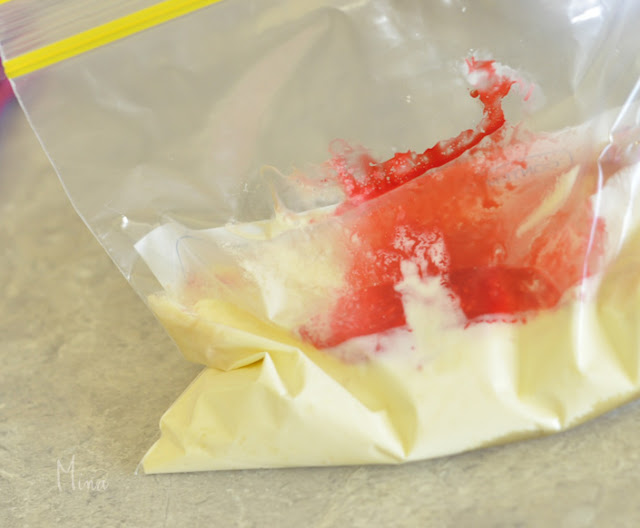
Method: In the sandwich bag, mix the cream, vanilla essence and sugar.
Add a few drops of colouring and/or flavour if you wish.
Miss S used strawberry chocolate flavouring. Seal well.


In the large bag, fill with ice half way and add the salt on top. Place the sandwich bag inside the ice bag. Seal very well and shake, shake shake!!


You may need to double bag the large bag. We found the ice made a couple of holes. You can wrap it in a tea towel if it's easier too.
Shake like crazy for 5-8 minutes.
The results is a delicious, creamy icecream! You can eat it straight from the bag, or freeze if you wish.

For hubby and I, I added a teaspoon of good quality instant coffee (go for an expresso roast) with the vanilla essence, and I tell you, it was like the best gelati from your favourite gelateria. Add a short black on the side, and you have the best treat.

Enjoy!


Tuesday, November 22, 2011

Cake Balls

Cake balls and cake pops are huge right now. OK, you're probably about to say they have been for a long while, but down here in Australia we are always late catching that train. So let me repeat that...
Cake balls are huge right now :)

I love to whip up a batch when we are invited out to someone's house. They are huge hit with kids as well as adults. Mostly, when having a social dinner, us Italians have a knack of over indulging, so when it comes to dessert, (and there is normally plenty on offer) we are fit to burst.
This is where I love cake balls. I can't fit in a big slice of cake after a huge dinner, but a cake pop, or two is perfect....especially when wanting to sample everything else. They are even great to have as a little indulgent treat with an afternoon cuppa :)

I thought I would share with you how I make cake balls.
Gather your goodies, and get ready to roll....

Ingedients:
1 packet cake mix of your choice, cooked and cooled completely. (I used Gluten free for these, so the Coeliacs in our family can enjoy them too)
1 x 225g block of Philladelphia Cream Cheese, softened
1/2 cup pure icing sugar
1 tablespoon butter
1 +1/2 packs of White Melts (375g packs) (Candy melts work better if you can get them, otherwise melt a teaspoon of vegetable oil with the melts for smoother consistancy)

Method:
Make sure your cake mix has cooled entirely. WIth your hands, crumble the cake into fine pieces, rubbing it between your palms for a finer result.
In a seperate bowl, mix philly cheese, icing sugar and softened butter. You can use your electric beater for a couple of minutes if you want.
Now, add the cream cheese mix slowly to the cake crumbs. DO NOT add the whole lot at once! I find cake mix sizes vary, so you may end up with mush if you pour in the whole lot. It should feel like cookie dough.
Mix in very well with your hands.

Roll into firm balls, place on a cookie sheet on a tray and place in the freezer for 20 minutes, or in the fridge until firm if you have more time. DO not freeze them through, or your coating will crack.


Using a double boiler method, stir your candy melts until totally melted, add the oil and stir through thoroughly.
Drop your first ball in. Some people choose to use a kebab stick to hold the balls, I find juggling the ball between two spoons once or twice works for me.
If using a stick, tap it gently on the edge of the bowl to remove excess melt.
Drop onto a fresh cookie sheet and decorate how you wish.

If you're wanting to make cake pops, dip the end of the stick into the melt before placing it into your ball. Only push it half way up.  Decorate and stand them up on a styrofoam block to set.


Remember to work quickly and make sure the entire ball is fully covered.
They sure don't look pretty the first time, (or in this case, the 10th time) but they taste too fab for anyone to care ;)


To see the queen of Cake Balls and Cake Pops (and for a virtual sugar rush) visit http://www.bakerella.com/